|
If you already have a license for all of the 3rd Powers Plugins, and if you would like to quickly install and setup them on your LightWave 3D, in just a few steps, the menu config files that can be downloaded below will help you do that.
Please follow the steps below to install all of them at once on your LightWave 3D. Step 1: Putting the plugin files directly into the plugins folder Place the plugin files of the 3rd Powers plugins that you have purchased, directly into the plugins folder, and launch Layout or Modeler. 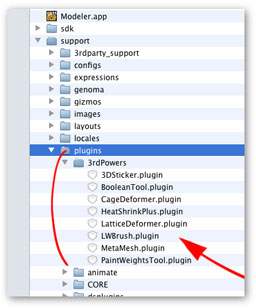 Step 2: Adding the plugins into LightWave NOTE: When the Autoscan Plugins option is checked (enabled by default) on the General Options Panel, and if the plugin files are placed under LightWave’s plugins directory (located under \LightWave_< VERSION NUMBER > by default), they will be automatically added into LightWave, therefore you will be able to skip this step. To quickly add all of the plugins into LightWave, choose Utilities > Plugins: Edit Plug-ins and click on the Scan Directory button. Immediately after selecting your plugins folder, the Add Plug-ins panel appears, which should report back that all of the plugins in the directory have been added. 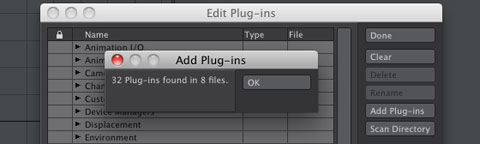 Step 3: Adding the buttons into the Toolbar menu Choose Edit > Edit Menu Layout to open the Configure Menus Panel. In the Menus window, right click at the place where you want to place the buttons (under ”Main Menu” in this example), and choose ”Import Branch” from the list, then selecting the downloaded menu config file (”3ps_menu_for_Layout.cfg” in Layout, or ”3ps_menu_for_Modeler.cfg” in Modeler) will add the buttons into the Tool menu. This step needs to be done in both Layout and Modeler. 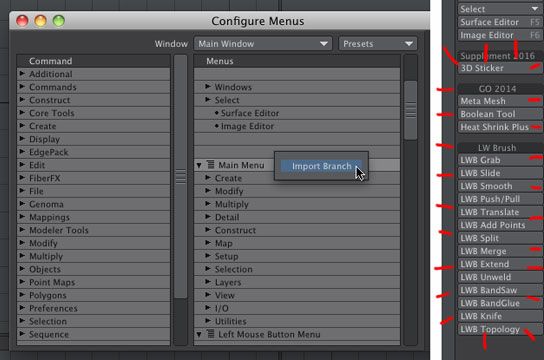 |